
Cleaning your air conditioner duct is an important task for keeping your home healthy and energy efficient. By taking care of this yourself, you can save money and ensure that the air in your home stays fresh. In this guide, we will share simple tips and tricks for DIY AC air duct cleaning that are easy to follow for any homeowner.
With just a few basic tools, you can remove dust and debris from your ducts, helping your air conditioner run smoothly and improving the air quality in your living spaces. Let’s get started and make air conditioner duct cleaning a straightforward task you can tackle with confidence.
Gather Your Tools
You don’t need many tools to start cleaning your AC air ducts. First, get a vacuum cleaner with a hose attachment. This will help suck up dust and dirt. A brush with soft bristles is useful for reaching areas deep inside the ducts. Also, have a screwdriver to open panels of the ducts if needed.
Wear a mask to protect yourself from dust. When planning for dryer vent cleaning cost, think about the tools you need, as they are often simple and affordable. Collect these items before you begin to make the job quicker and easier.
Turn Off the Power to Your AC System
Before you begin cleaning your AC air ducts, it’s important to turn off the power to your AC system. This is a key safety step that helps prevent accidents, as working with electrical appliances can be risky. To do this, locate the switch or circuit breaker that controls your AC unit and make sure it is in the off position.
By cutting the power, you are ensuring that you can easily and safely handle the areas around the ducts without any worry. Taking this simple precaution helps create a safer experience air duct cleaning and ensures you can focus on getting the job done right.
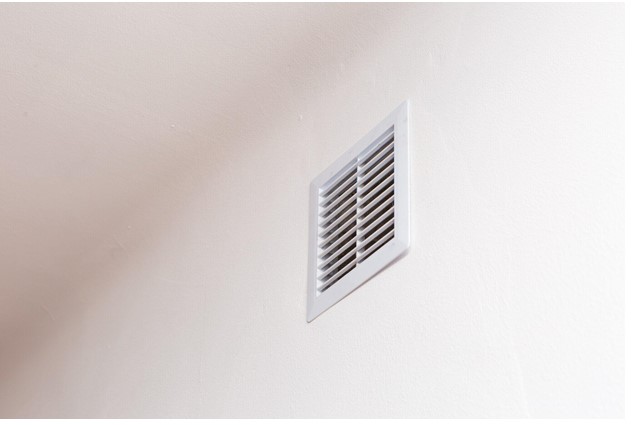
Remove Vent Covers and Vacuum Them
To clean the air ducts, start by taking off the vent covers. You might need to use a screwdriver to loosen any screws holding them in place, Once the covers are off, take them to a clean area.
Use your vacuum cleaner with an attachment to suck up any dust and dirt that has built up on the covers. If needed, you can also wash them with soap and water, then let them dry completely before putting them back. This step helps make sure that dust doesn’t blow back into your ducts, keeping the air in your home fresh and clean.
Use a Brush to Loosen Debris in the Ducts
Using a brush to clean your AC air ducts is simple. Take a soft-bristled brush and carefully reach inside the ducts. Gently scrub to loosen any dust or dirt stuck to the walls. Be sure to reach as far in as you can to get the most out of this cleaning. Avoid using too much force, as this could damage the ducts.
This step will make it easier for the vacuum to remove loosened dirt and help your AC run better. Remember to brush gently and cover all areas inside the ducts for best results.
Connect Your Vacuum to the Main Duct
To clean the main duct, take your vacuum and connect it to the main opening of the duct. Use a hose attachment to reach inside as far as you can.
Turn on the vacuum and let it suck up the dust and dirt that the brush loosened earlier. Make sure to move the hose around to get all areas clean. This helps keep the air in your home nice and fresh. Take your time and clean every inch you can reach for the best results. Once done, your air should flow smoothly through the ducts.
Move from Room to Room
When you’re ready to clean the ducts in each room, it’s best to move from one room to the next. Start with one room and finish cleaning all the ducts there before moving on. This keeps things simple and helps you stay on track. Make sure to replace all the vent covers in each room after you’re done cleaning it.
Repeat the same steps, like vacuuming and brushing, for each room in your house. Taking it one room at a time makes the work more manageable and ensures every area gets cleaned properly. By working methodically, you ensure the air in your home stays fresh throughout.
Check for Mold and Mildew
Mold and mildew can grow in your air ducts if they are moist and dirty. To check for these, look inside the ducts with a flashlight. Mold might look like dark spots or fuzzy growths, and mildew can be a thin white or yellow film. If you see any mold or mildew, it’s important to clean it up right away because it can make the air in your home unhealthy.
You may need to use a special cleaner made for mold and mildew. Always wear a mask and gloves to protect yourself when dealing with these. Keeping your ducts dry can help stop mold and mildew from growing.
Clean the Blower Motor and Fan Blades
Cleaning the blower motor and fan blades is an important step to keep your AC working well. First, turn off the power to stay safe. Next, take off the panel to find the blower motor and fan. Use a soft brush to gently clean dirt and dust off these parts. Be careful not to bend the blades.
After brushing, use a damp cloth to wipe the parts if needed. This will help your AC move air better and be more energy-efficient. Make sure to replace the panel and check that everything is in place before turning the power back on. Doing this helps keep your home cool and fresh.
Learn More About AC Air Duct Cleaning
In conclusion, AC air duct cleaning is a simple and rewarding task. By following these steps, you can help your air conditioner work efficiently and improve the air quality in your home.
Regular maintenance keeps your living spaces fresh and helps avoid costly repairs down the line. Remember to check for mold and handle all parts with care, ensuring a safe and thorough cleaning process.
Visit our blog for more!