
How to Make the Perfect Milanesa de Pollo: A Step-by-Step Recipe
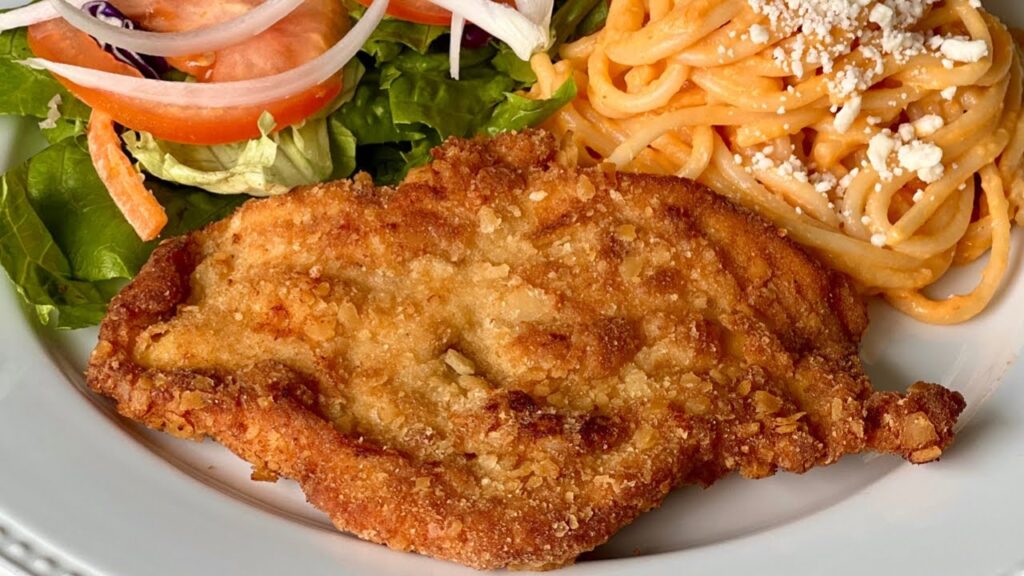
If you’ve ever wanted a meal that’s crispy, juicy, comforting, and easy enough for a weekday dinner, Milanesa de Pollo is the perfect choice. This dish is loved across Latin America and Spain, and once you try it, you’ll understand why. It’s basically a thin chicken cutlet that’s breaded and fried until golden, crunchy, and irresistible.
The best part? Milanesa de Pollo doesn’t require fancy ingredients. With just chicken, breadcrumbs, eggs, and a few seasonings, you can create a restaurant-quality meal at home. Whether you serve it with rice, salad, mashed potatoes, or inside a sandwich, this recipe is always a win.
In this article, I’ll walk you through every step to make the perfect Milanesa de Pollo, including pro tips, common mistakes, and serving ideas so your chicken comes out crispy every time.
What Is Milanesa de Pollo?
Milanesa de Pollo is a breaded chicken cutlet that’s pounded thin, seasoned well, coated in flour, egg, and breadcrumbs, then fried until crispy. It’s similar to:
- Chicken schnitzel (Germany/Austria)
- Chicken parmesan (Italy, without sauce)
- Tonkatsu (Japan, but chicken-based)
The word “milanesa” comes from Milan, Italy, but the dish has become a staple in Argentina, Mexico, Uruguay, Colombia, and many other countries.
Why This Recipe Works So Well
The reason Milanesa de Pollo is so popular is because it hits all the right textures and flavors:
- Thin chicken cooks quickly and stays tender
- Double coating gives a crunchy crust
- Seasoning inside the breading ensures every bite tastes amazing
- Shallow frying keeps it crispy without soaking in oil
Once you learn the technique, you can repeat it forever and even customize it.
Ingredients You’ll Need
To make perfect Milanesa de Pollo, gather the following:
- 2 large chicken breasts (boneless, skinless)
- 1 cup all-purpose flour
- 2 large eggs
- 2 tablespoons milk (optional, but helps the egg mixture)
- 1 ½ cups breadcrumbs (Panko or regular)
- 1 teaspoon salt
- 1 teaspoon black pepper
- 1 teaspoon garlic powder
- 1 teaspoon paprika (optional but recommended)
- ½ teaspoon oregano (optional)
- ½ teaspoon chili flakes (optional)
- Oil for frying (vegetable, sunflower, or canola)
- Lemon wedges (for serving)
Quick Ingredient Table (Exactly One Table)
| Ingredient | Purpose in Recipe | Best Choice |
|---|---|---|
| Chicken breasts | Main protein, gets pounded thin | Fresh, boneless |
| Flour | Helps egg stick better | All-purpose |
| Eggs | Creates binding layer | Large eggs |
| Breadcrumbs | Makes crispy coating | Panko for extra crunch |
| Garlic powder | Adds savory depth | Fresh, not expired |
| Paprika | Adds color + flavor | Smoked paprika if available |
| Oil | For frying | Neutral oil with high smoke point |
| Lemon | Brightens flavor | Fresh wedges |
Step 1: Prepare the Chicken Properly
Start by slicing each chicken breast horizontally (like opening a book) to make thinner cutlets. You can also cut each breast into 2 pieces.
Now place the chicken between two sheets of plastic wrap or parchment paper.
Using a meat mallet, rolling pin, or even a heavy pan, pound the chicken until it’s evenly thin—about ¼ inch thick.
This is one of the most important steps because:
- thin chicken cooks evenly
- it stays juicy
- it becomes tender
- it fries faster
Step 2: Season the Chicken for Real Flavor
A common mistake is only seasoning the breadcrumbs. Don’t do that.
Season the chicken itself with:
- salt
- black pepper
- a little garlic powder
Let it sit for 5 minutes while you prepare the breading station.
This small step makes a huge difference in taste.
Step 3: Set Up the Breading Station
You’ll need 3 bowls or plates:
- Flour (season it with a pinch of salt + pepper)
- Egg mixture (eggs + milk, whisked well)
- Breadcrumb mixture (breadcrumbs + garlic powder + paprika + oregano)
Pro tip: Mix your breadcrumbs with spices so the crust is flavorful, not bland.
Step 4: Bread the Chicken the Right Way
Now coat each chicken piece in this order:
- Flour – shake off excess
- Egg – let extra drip off
- Breadcrumbs – press firmly
Pressing the breadcrumbs helps them stick better and prevents them from falling off during frying.
Once breaded, place the chicken on a plate and let it rest for 10 minutes.
This resting time helps the coating set and improves crispiness.
Step 5: Heat the Oil Perfectly
In a large skillet, pour enough oil to cover the bottom—about ½ inch deep.
Heat the oil over medium heat.
The oil should be hot but not smoking. If you want to test it:
- Drop a tiny breadcrumb in
- If it sizzles immediately, it’s ready
If the oil is too cold, the Milanesa will absorb oil and become greasy.
If it’s too hot, the outside will burn before the inside cooks.
Step 6: Fry the Milanesa Until Golden
Carefully place the chicken into the hot oil.
Don’t overcrowd the pan—fry 1 or 2 pieces at a time depending on skillet size.
Cook each side for about:
- 3–4 minutes per side
You want it golden brown, crispy, and cooked through.
When done, transfer to a plate lined with paper towels or a wire rack.
A wire rack is best because it keeps the crust crispy.
Step 7: Serve Immediately for Maximum Crunch
Milanesa de Pollo tastes best fresh, right after frying.
Serve it with lemon wedges and squeeze fresh lemon over the top. This cuts through the richness and makes the flavors pop.
Best Side Dishes for Milanesa de Pollo
One of the reasons this dish is so loved is because it goes with almost anything.
Here are some classic serving ideas:
- White rice or Spanish rice
- Mashed potatoes
- French fries
- Simple green salad
- Tomato and onion salad
- Roasted vegetables
- Refried beans
- Pasta with garlic and butter
Milanesa de Pollo Sandwich Idea (So Good!)
If you want something next-level, turn it into a sandwich:
- crusty bread or bolillo
- mayonnaise or garlic sauce
- lettuce and tomato
- pickled onions
- melted cheese (optional)
This is one of the best crispy chicken sandwiches you’ll ever eat.
How to Make Milanesa Extra Crispy
If you want that perfect crunch, here are the top tips:
- Use Panko breadcrumbs
- Press the breadcrumbs firmly
- Let the chicken rest after breading
- Don’t overcrowd the pan
- Keep oil temperature steady
- Drain on a rack instead of paper towels
Common Mistakes to Avoid
Even though the recipe is simple, these mistakes can ruin it:
Mistake 1: Chicken Too Thick
Thick chicken takes longer to cook, which makes the coating burn.
Always pound it thin.
Mistake 2: Skipping Seasoning
If you don’t season the chicken and breadcrumbs, the final result will taste bland.
Mistake 3: Oil Not Hot Enough
This leads to greasy, soggy Milanesa.
Mistake 4: Overcrowding the Pan
Overcrowding lowers oil temperature and makes the crust soft.
How to Store and Reheat Milanesa de Pollo
If you have leftovers, don’t worry—it reheats well if done properly.
Refrigerator Storage
Store in an airtight container for up to 3 days.
Best Reheating Method
For crispiness, reheat in:
- oven at 375°F for 10–12 minutes
- air fryer at 375°F for 6–8 minutes
Avoid microwaving if possible, because it makes the crust soft.
Can You Bake Milanesa de Pollo Instead of Frying?
Yes, you can bake it if you want a lighter version.
To bake:
- Preheat oven to 425°F
- Place breaded chicken on a wire rack over a baking sheet
- Spray lightly with oil
- Bake 18–20 minutes, flipping halfway
It won’t be exactly the same as frying, but it’s still delicious.
Final Thoughts
Milanesa de Pollo is one of those recipes that feels comforting, crispy, and satisfying every single time. It’s easy enough for beginners, but also impressive enough to serve to guests. Once you master the technique—pounding the chicken thin, breading correctly, and frying at the right temperature—you’ll be able to make perfect Milanesa anytime.
Whether you serve it with rice and salad, turn it into a sandwich, or top it with fresh lemon, this dish delivers a crunchy, juicy bite that never disappoints.