
Silicone Molds: The Ultimate Guide to Easy Crafting, Baking, and DIY Creations
Silicone molds have completely changed the way people craft, bake, and create DIY projects at home. Thanks to their flexibility, non-stick surface, and long-lasting durability, they make it incredibly easy to create clean, detailed shapes without the frustration of breaking or ruining your final product.
Whether you’re making chocolates, baking cupcakes, pouring resin jewelry, crafting soap bars, or even creating candles, silicone molds open up endless creative possibilities. But to truly get perfect results every time, you need to know how to use them the right way.
In this complete guide, we’ll explore the best tips, hacks, and techniques to help you master silicone molds and upgrade your projects like a pro.
Why Silicone Molds Are So Popular
Before jumping into the tips, it helps to understand why silicone molds are loved by crafters and bakers worldwide. Silicone is naturally non-stick, meaning your creations can pop out smoothly without needing excessive greasing. It also handles both high and low temperatures, making it perfect for hot and cold projects.
Silicone molds are also reusable, which makes them a cost-effective and eco-friendly choice compared to disposable plastic molds.
Key Benefits of Silicone Molds
Silicone molds are a favorite tool because they offer several advantages, including:
Non-stick surface that makes removal simple
Heat-resistant and freezer-safe for many different projects
Flexible design that prevents breakage during removal
Reusable and durable, making them long-lasting
Available in countless shapes and styles, from basic to highly detailed
Preparing Silicone Molds for Easy Release
One of the most common struggles people face is removing the final product cleanly. The good news is that this is easy to fix with proper preparation.
If you’re working with sticky ingredients like melted chocolate, candy, or soap base, lightly greasing the mold can help a lot. You don’t need much—just a thin layer of oil or a small spray of non-stick cooking spray.
For cold projects such as resin casting, frozen desserts, or ice molds, placing the silicone mold in the freezer for a few minutes before removing the item can make a big difference. Cold materials contract slightly, making them easier to pop out.
Pro Tips for Smooth Removal
Lightly grease molds for sticky mixtures like chocolate or soap
Freeze resin or cold creations for a few minutes before removal
Gently push from the bottom instead of pulling from the top
How to Fill Silicone Molds Without Making a Mess
Filling silicone molds, especially detailed ones, can get messy if you pour directly from a bowl or cup. This is even more common when working with thin liquids like resin, melted chocolate, candle wax, or batter.
The easiest way to avoid spills is by using a piping bag, squeeze bottle, or even a zip bag with a small corner cut off. This gives you full control and helps you fill each section neatly.
Another smart trick is placing the silicone mold on a flat tray or baking sheet before filling it. This keeps the mold stable and makes it easier to move without spilling.
Best Filling Hacks
Use a piping bag or squeeze bottle for precision
Place molds on a tray for support and safe transport
Fill slowly to avoid overflow and uneven sections
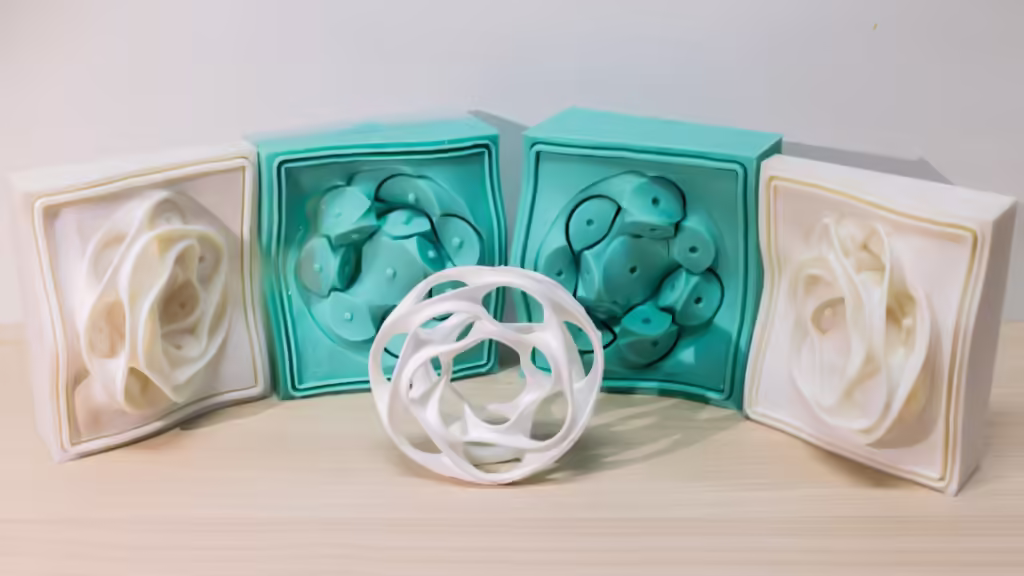
How to Stop Air Bubbles in Resin Silicone Molds
Air bubbles are one of the biggest problems when working with resin molds. They can ruin the look of your final piece, especially in clear resin jewelry or decorative resin art.
To prevent bubbles, pour resin slowly and steadily instead of dumping it all at once. If bubbles appear, gently tapping the mold helps them rise to the surface.
For stubborn bubbles trapped in corners or small details, a toothpick can help pull them out. You can also lightly pass a heat gun or torch over the resin surface to release trapped air.
Bubble-Free Resin Tips
Pour resin slowly to reduce trapped air
Tap the mold gently to push bubbles upward
Use a toothpick for small corners and detailed areas
Use a heat gun or torch lightly for a smooth finish
Creative Ways to Use Silicone Molds Beyond Baking
Most people think silicone molds are only for baking or chocolates—but they can be used for so much more. If you love DIY projects, silicone molds can become one of the most useful tools you own.
Here are some fun and creative ideas you can try:
Soap Making with Silicone Molds
Silicone molds are perfect for soap making because they release soap bars easily and allow you to create detailed shapes. You can make guest soaps, decorative soaps, or custom bars for gifts.
Candle Making with Unique Shapes
Silicone molds can also be used for candles. Simply pour melted wax into the mold, place the wick, and allow it to cool. Once the wax sets, the candle pops out beautifully.
DIY Crayons from Broken Pieces
Instead of throwing away broken crayons, melt them down and pour the wax into silicone molds. Kids love the fun shapes, and it’s a great way to reuse old crayons.
Ice Cubes and Chocolate for Parties
Silicone molds make the best party ice cubes. You can create hearts, stars, flowers, or even themed shapes. They also work beautifully for homemade chocolates and candy gifts.
Popular Silicone Mold Project Ideas
Custom soap bars for personal use or gifts
Handmade candles in creative shapes
Upcycled crayons in fun designs for kids
Fancy ice cubes and chocolates for special occasions
How to Clean Silicone Molds the Right Way
Silicone molds are easy to clean, which is one of their biggest advantages. Many silicone molds are dishwasher safe, but hand washing works just as well.
Use warm water and mild soap, and avoid harsh scrubbers. Abrasive pads can damage the smooth surface over time, which can make the mold harder to use in future projects.
Also, make sure the molds are fully dry before storing them. Moisture trapped between stacked molds can lead to odors or even mold buildup.
Cleaning and Storage Tips
Wash with warm soapy water or place in the dishwasher
Avoid rough scrubbers that can damage silicone
Dry completely before storing
Store flat to prevent bending or deformation
Fixing Common Silicone Mold Problems
Even though silicone molds are easy to use, a few common issues can still happen. Here are quick fixes that work in most cases.
Problem: Your Item Won’t Come Out
If your creation feels stuck, don’t force it. Put the mold in the freezer for 5–10 minutes. Once cold, gently press from the bottom and it should release smoothly.
Problem: The Mold Looks Warped
If your mold becomes bent or warped, place it on a flat surface. In some cases, warming it slightly (like low heat in the oven for a short time) can help it return to its original shape.
Problem: Resin Bubbles Ruined the Design
To avoid bubbles next time, pour slower and use a heat gun or torch to remove bubbles before the resin sets.
Quick Solutions Summary
Stuck item: Freeze briefly and push from the bottom
Warped mold: Use gentle heat and flatten properly
Air bubbles: Pour slowly, tap mold, and use heat carefully
Table: Best Silicone Mold Uses and Helpful Tips
| Project Type | Best Tip for Success | Common Mistake to Avoid |
|---|---|---|
| Chocolate & Candy | Lightly grease for smooth release | Overfilling small sections |
| Resin Casting | Pour slowly and remove bubbles with heat | Mixing too fast and trapping air |
| Soap Making | Use rubbing alcohol spray for smooth tops | Removing before fully hardened |
| Candle Making | Secure wick before pouring wax | Pouring wax too hot |
| Ice Cubes | Use filtered water for clarity | Twisting mold too aggressively |
Final Thoughts
Silicone molds are one of the most useful tools you can own if you enjoy crafting, baking, or DIY projects. They make it easy to create beautiful, detailed designs without stress, and they can be used in countless ways—from soap and candles to resin art and custom chocolates.
Once you learn the right preparation methods, filling techniques, and cleaning habits, your silicone mold projects will come out smoother, cleaner, and more professional every time.
So grab your silicone molds, start experimenting, and enjoy the creative freedom they bring because once you master them, the possibilities truly become endless.